Guide
Understanding Aida Count and Finished Design Size
The short answer
Finished size equals stitches divided by stitches per inch. On Aida, the count is stitches per inch, so a 140-stitch design on 14-count is 10 inches (25.4 cm). On evenweave or linen stitched over two threads, divide the thread count by two first. Margins for framing are added outside the stitched area and never change the stitch count.
The same chart can become a tiny ornament or a cushion cover. The only thing that changes is the fabric. Understanding fabric “count” lets you predict the finished size of any pattern before you cut a single thread, and buy the right amount of fabric the first time.
What “count” means
Count is the number of stitches (Aida) or threads (evenweave and linen) per inch of fabric.
- Aida is woven in distinct blocks with obvious holes. Each block takes one cross stitch, so 14-count Aida = 14 stitches per inch.
- Evenweave and linen are woven from single threads. Cross stitches are normally worked over two threads, so 28-count evenweave stitched over two gives 14 stitches per inch, the same size as 14-count Aida.
Higher count means smaller stitches and a smaller finished design. Aida cloth is the usual starting fabric.
The formula
Finished size (inches) = stitches ÷ stitches per inch Finished size (cm) = inches × 2.54
For evenweave over two: stitches per inch = thread count ÷ 2.
Worked example
A pattern is 140 × 140 stitches.
- On 14-count Aida: 140 ÷ 14 = 10 × 10 inches, or 25.4 × 25.4 cm.
- On 18-count Aida: 140 ÷ 18 = 7.8 × 7.8 inches (19.8 cm).
- On 32-count linen over two (16 per inch): 140 ÷ 16 = 8.75 inches (22.2 cm).
The stitch count never changes, only the size of each stitch.
Quick conversion table
Finished width in inches for common pattern widths:
| Stitches | 11-count | 14-count | 16-count | 18-count |
|---|---|---|---|---|
| 20 | 1.8 | 1.4 | 1.3 | 1.1 |
| 50 | 4.5 | 3.6 | 3.1 | 2.8 |
| 100 | 9.1 | 7.1 | 6.3 | 5.6 |
| 150 | 13.6 | 10.7 | 9.4 | 8.3 |
| 200 | 18.2 | 14.3 | 12.5 | 11.1 |
You don’t need to calculate by hand: the Project panel in the Studio shows stitched size and fabric size in inches and centimetres for any count, including custom values, and every PDF prints the size on its overview page.
Margins: the fabric you don’t stitch
The stitched area is not the size of fabric you need. You’ll want unstitched fabric around it for a hoop, for framing, or for finishing into a cushion. A common allowance is 3 inches (7–8 cm) on every side, so:
Fabric to cut = stitched size + 2 × margin
For the 140 × 140 example on 14-count: 10 + 6 = 16 × 16 inches of fabric. Margins change the fabric you buy, not the number of stitches, and not the chart. Small ornaments and cards need less (1–2 in), large framed pieces more.
Choosing a count for your project
| Count | Feel | Typical strands | Best for |
|---|---|---|---|
| 11 | Large, easy to see | 3 | Children, beginners, bold designs |
| 14 | The standard | 2 | Most projects, first projects |
| 16 | Finer | 2 | Smoother pictures, medium detail |
| 18 | Small, delicate | 1–2 | Detailed charts, small keepsakes |
| 28/32 linen over two | Traditional | 1–2 | Samplers, heirloom pieces |
Strand guidance is the usual starting point; test a few stitches and add or remove a strand for the coverage you like. See choosing fabric, thread and needles.
Resizing a design
If a pattern comes out too large on your preferred fabric, you have three options:
- Use a higher count: the quickest fix with the same chart.
- Re-convert at fewer stitches: for photo patterns, convert again at a smaller width (detail is lost).
- Trim empty space: the Studio’s Trim empty edges removes unused rows and columns around the design.
Resizing the canvas in the Studio adds or removes empty squares around the design; it does not scale the artwork.
Common mistakes
- Applying the Aida formula to evenweave without dividing by two. Your design would come out half the size you expected.
- Buying fabric the size of the stitched area. Always add margins.
- Assuming all fabrics of one count are identical. Real fabrics vary slightly; for a tight frame fit, stitch a 10 × 10 test square and measure it.
- Forgetting the frame’s rebate. Frames cover a few millimetres of fabric at the edge.
A note on “over one”
Some stitchers work evenweave over one thread for very fine detail. Then stitches per inch equals the thread count (28-count over one = 28 per inch), and the design shrinks by half. The Studio supports this through a custom count; set the count to the fabric’s thread count and “over” to 1.
Worked examples
A card motif. The Little Heart is 13 × 12 stitches. On 14-count: 13 ÷ 14 = 0.93 in by 12 ÷ 14 = 0.86 in (2.4 × 2.2 cm). For a card window of 2 × 2 inches, add about 1 inch of fabric on each side: cut 3 × 3 inches.
A framed name. A design of 72 × 30 stitches on 14-count is 5.1 × 2.1 in (13.1 × 5.4 cm). With 3-inch margins, cut 11.1 × 8.1 inches of fabric.
The same chart on linen. Stitched on 32-count linen over two (16 stitches per inch), the 72 × 30 design becomes 4.5 × 1.9 in.
Choosing a count to hit a size. You want a 150-stitch-wide design to be about 8 inches wide: 150 ÷ 8 = 18.75 stitches per inch, so 18-count Aida (8.3 in) is the closest standard choice.
Measuring your own fabric
Fabrics vary slightly from their nominal count. If a framed piece must fit exactly:
- Stitch, or simply count, 10 squares (Aida) or 20 threads (evenweave over two).
- Measure that distance in millimetres.
- Divide 254 by the measurement to get your real stitches per inch (because 10 stitches × 25.4 mm per inch = 254).
For example, if 10 Aida squares measure 18.4 mm, the real count is 254 ÷ 18.4 ≈ 13.8 stitches per inch, and a 140-stitch design will be about 10.1 inches instead of exactly 10.
Cheat sheet
| Count | Stitches per cm | 10 stitches measure |
|---|---|---|
| 11 | 4.3 | 23.1 mm |
| 14 | 5.5 | 18.1 mm |
| 16 | 6.3 | 15.9 mm |
| 18 | 7.1 | 14.1 mm |
Quick conversions you’ll use often
| You know | Formula | Example |
|---|---|---|
| Stitches and fabric count | inches = stitches ÷ count | 98 stitches on 14-count = 7.0 in |
| Inches you want and count | stitches = inches × count | 6 in on 16-count = 96 stitches |
| Evenweave count over two | stitches per inch = count ÷ 2 | 28-count over two = 14 per inch |
| Inches to centimetres | cm = in × 2.54 | 7.0 in = 17.8 cm |
The size calculator does all four at once, adds margins and estimates thread, and shows the same design on every common fabric side by side.
Fitting a design to a frame you already own
Measure the frame’s opening, subtract a little for the mat or the rebate, and work backwards: multiply the width you want by the stitches per inch of your fabric, and use that as the width in the photo converter. If the number is over 300 stitches, either choose a finer fabric (18-count fits more into the same space) or accept a slightly smaller stitched area with a wider mat. For text, the text generator shows the finished size as you type, so you can adjust the letter gap until the words fit.
Questions stitchers ask
How do I convert stitches to centimetres?
Divide the stitches by the fabric count to get inches, then multiply by 2.54. For example, 70 stitches on 14-count is 5 inches, or 12.7 cm.
Does a higher count mean more stitches?
No. The number of stitches in the chart stays the same; a higher count simply makes each stitch smaller, so the finished piece is smaller.
How much extra fabric do I need?
A common allowance is 3 inches (7–8 cm) on every side for framing. Small cards and ornaments need less; large framed pieces sometimes more.
Is 28-count evenweave the same size as 14-count Aida?
Yes, when you stitch over two threads, which is the usual method. Each cross covers a 2 × 2 group of threads, giving 14 stitches per inch.
Try it now
Everything in this guide works in the free cross stitch pattern maker, right in your browser, with no account.
Check sizes in the Studio project panel →A pattern to practise with
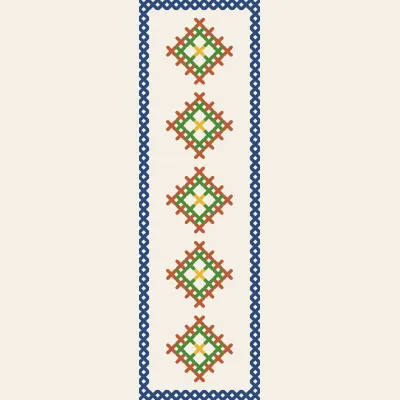
Geometric Bookmark
A 13-stitch-wide bookmark band of repeating diamonds.