Guide
Small Cross Stitch Patterns: Sizes, Ideas and Finishing Methods
The short answer
Small cross stitch patterns, roughly under 30 stitches across, finish in an evening or two and suit cards, ornaments, magnets, patches and bookmarks. Choose 14- or 18-count fabric depending on the size you need, leave at least an inch of fabric around the design, and pick the finishing method (card mount, felt backing, iron-on interfacing or band) before you start.
Small projects are the quiet heroes of cross stitch. They’re quick, they use up thread scraps, they make thoughtful gifts, and they let you try a new technique without a months-long commitment. The trick is planning the finish before you take the first stitch, because the finish decides the size, the fabric and the margins.
How small is small?
| Design size | 14-count | 18-count | Good for |
|---|---|---|---|
| 12 × 12 | 0.9 in (2.2 cm) | 0.7 in (1.7 cm) | Magnets, pins, tiny ornaments |
| 16 × 16 | 1.1 in (2.9 cm) | 0.9 in (2.3 cm) | Ornaments, card toppers |
| 20 × 20 | 1.4 in (3.6 cm) | 1.1 in (2.8 cm) | Cards, small hoops |
| 30 × 30 | 2.1 in (5.4 cm) | 1.7 in (4.2 cm) | 3–4 in hoops, coasters |
Our small patterns page lists each design’s exact size on 11, 14, 16 and 18 count.
Project ideas and how to finish them
Greeting cards
Stitch a motif like the Little Heart and mount it behind a card with a window (“aperture card”), or glue a trimmed piece onto the front with a fabric-safe adhesive. Leave about 1 in (2.5 cm) around the design and back it with thin iron-on interfacing so the edges don’t fray.
Ornaments
Stitch on 14- or 18-count, then:
- Cut the design out with a few rows of margin.
- Glue or stitch it to felt and cut the felt slightly larger.
- Add a ribbon loop at the top, and a second felt layer behind for a neat back.
A Gold Star or Crescent Moon works beautifully.
Magnets and pins
Use tiny designs (12–16 stitches) on 18-count. Mount in a small frame blank or on card with a magnet or pin back glued on. Interfacing on the back keeps the fabric flat.
Bookmarks
Stitch on Aida band (a narrow strip with finished edges) or on regular Aida and back it with felt. The Geometric Bookmark is 13 stitches wide, under an inch on 14-count, and you can add or remove repeats to change its length.
Patches and pockets
Use waste canvas to stitch onto clothing: tack it on, stitch through both, then dampen and pull out the canvas threads. Keep designs bold and outlined; denim and knit fabrics are less forgiving than Aida.
Name tags and gift tags
Combine a small motif with a name from the text generator. Sprig Mini letters are 5 stitches tall, about a third of an inch on 14-count, which is perfect for tags.
Fabric and margins for small work
- Margins: even small pieces need room to hold. Allow at least 1 in (2.5 cm) on each side, or 2–3 in if you’ll use a hoop.
- Hoop or not: a 4-inch hoop is comfortable for designs up to about 30 stitches. Very small scraps can be stitched in the hand.
- Fabric colour: white and cream are classic; coloured Aida (navy, black) makes bright threads pop but is harder to count on.
Using up thread
Small projects are perfect for leftover floss. In the Studio, you can recolour any pattern to match threads you already own: select a colour in the Colours panel and change it, and the symbols and counts stay intact.
Common mistakes
- Cutting the margin too small to hold or finish.
- Skipping interfacing, so the edges fray when trimmed.
- Using glue that soaks through and stains the stitches; test on a scrap first.
- Choosing a design with many isolated stitches for something as small as a magnet; tiny pieces look best with solid shapes.
Small pieces are also the best way to test a new fabric count, a thread brand or a stitching technique before using it on something larger.
Worked example: a felt-backed ornament
You need: a finished small design (for example the Gold Star, 15 × 15 stitches), felt in a matching colour, thin fusible interfacing, ribbon, fabric glue or matching thread.
- Press the stitched piece face down on a towel so the stitches stay raised.
- Fuse interfacing to the back of the stitched area plus a few rows around it.
- Trim the Aida leaving 2–3 rows of fabric beyond the stitches, following the outline or cutting a neat circle or square.
- Glue or stitch the piece onto felt, then cut the felt about 3 mm larger all round.
- Fold a 15 cm ribbon into a loop and attach it at the top between the felt and a second felt backing layer.
- Stitch or glue the two felt layers together around the edge.
Card mounting in five minutes
- Choose an aperture card whose window is slightly larger than the design.
- Centre the stitched piece behind the window and tape it in place.
- Fold the card’s inner flap over the back to hide the reverse.
Finishing methods compared
| Method | Effort | Durability | Best for |
|---|---|---|---|
| Aperture card | Low | Medium | Greetings, quick gifts |
| Felt-backed ornament | Medium | High | Holiday decorations |
| Mini hoop (3–4 in) | Low | High | Wall displays |
| Magnet or pin frame | Low | Medium | Tiny motifs |
| Waste canvas on clothing | Medium | High (washable) | Patches, pockets |
Washing and pressing before you finish
Hands leave oils on fabric even when they look clean, and hoop marks can linger. Before framing or sewing up:
- Wash gently in lukewarm water with a little mild soap. Don’t rub; swish and soak for a few minutes.
- Rinse until the water runs clear. If a colour runs, keep rinsing in cool water until it stops, and don’t let the piece dry while bleeding.
- Roll it in a clean towel to remove water. Never wring.
- Press face down on a thick, soft towel, with the iron on a cotton setting and no steam directly on the stitches. The towel lets the stitches sink in instead of being flattened.
Skip washing for pieces with metallic threads, beads or glued elements; spot-clean those instead.
Choosing a finish by size
| Finished size | Good finishes |
|---|---|
| Under 2 in (5 cm) | Brooch, keyring, needle minder, gift tag |
| 2–4 in (5–10 cm) | Ornament, small hoop, card insert, pin cushion |
| 4–6 in (10–15 cm) | Hoop art, small cushion, framed piece |
| Narrow strip | Bookmark, band sampler, ribbon trim |
Check the stitched size for your fabric with the size calculator before you buy a frame or a hoop.
Materials for finishing small pieces
Keep a small finishing kit ready so a project doesn’t sit waiting: felt in a few colours for backing ornaments and brooches, thin card or acid-free mount board, double-sided tape or fabric glue for card inserts, narrow ribbon for hanging loops, and a few small hoops. A finished piece is the best motivation to start the next one.
Questions stitchers ask
How do I stop small pieces from fraying?
Iron lightweight fusible interfacing to the back before trimming, or leave a margin and fold it behind a backing card.
What fabric count suits ornaments?
14-count is easy to stitch; 18-count makes ornaments smaller and more delicate. Use 1–2 strands on 18-count.
Can I stitch a small design onto clothes?
Yes, with waste canvas basted over the fabric. Stitch through both layers, then dampen the canvas and pull its threads out one by one.
How small can a design be and still look good?
Simple outlined shapes read well down to about 10–12 stitches. Below that, choose very bold, iconic shapes such as hearts and stars.
Try it now
Everything in this guide works in the free cross stitch pattern maker, right in your browser, with no account.
See the small pattern collection →A pattern to practise with
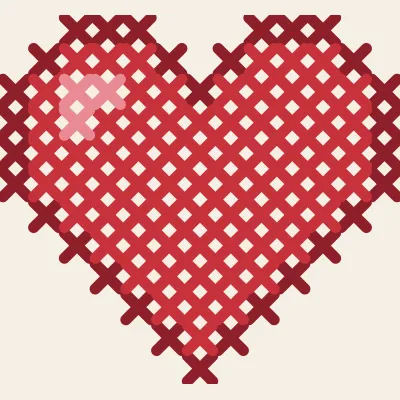
Little Heart
A 13×12 heart in three reds with a small highlight.