Guide
How to Reduce Confetti Stitches Without Losing Detail
The short answer
Confetti stitches are isolated single stitches of one colour surrounded by others. Reduce them by lowering the colour count, turning off dithering, and merging isolated groups of one or two stitches into the neighbouring colour they touch most. Protect small deliberate details such as eyes and highlights before cleaning up, and always preview the changes first.
“Confetti” is what stitchers call scattered single stitches: a lone dark square in a light area, a speck of green in a red flower. A few are normal, and some are essential. Hundreds of them make a pattern slow and frustrating, because each one can mean cutting a new length of thread, starting it, making one cross and finishing it off.
Automatic converters are the main source of confetti, which is why this site measures it openly instead of hiding it behind a “quality score.”
Why photo patterns produce confetti
When a photo is reduced to a few colours, each stitch gets the palette colour nearest to its average. In areas where the true colour sits halfway between two palette colours, such as a gradient on a cheek, neighbouring stitches flip back and forth between the two. Add fine textures (fur, foliage) and dithering, and you get speckle everywhere.
How we measure it
The Studio’s Stitchability Check uses simple, transparent definitions:
- A region is a group of same-colour stitches connected edge to edge (up, down, left or right). Diagonal touching does not connect, because the thread can’t travel diagonally on the front without showing.
- An isolated group is a region of at most N stitches. N is 2 by default and adjustable from 1 to 4.
It reports total stitches, colours used, regions per colour, and the number of isolated groups and their stitches, plus the share of all stitches that are isolated. A short note explains what the numbers mean; there is no invented score.
Step 1: Prevent confetti before converting
- Fewer colours. Lowering the limit from 30 to 16 often halves the isolated stitches.
- Dithering off. It is off by default for good reason.
- Simplify (Advanced). This setting replaces a stitch when none of its eight neighbours shares its colour and at least three share another colour. It runs during conversion and is easy to compare by toggling.
- Better source. Smooth, evenly lit photos with plain backgrounds produce far less noise (choosing a photo).
Step 2: Find it
In the Check panel, turn on Highlight isolated groups. Every isolated group gets a ring on the chart, so you can see whether they cluster in the background (usually safe to clean) or sit on important features.
Step 3: Protect what matters
Some single stitches are the design: the catchlight in an eye, the dot of an “i”, a star in a night sky, the nose on a cat. Use the Select tool to draw a rectangle around each such detail and press Protect selected area. Protected areas are outlined in blue and ignored by the cleanup.
Step 4: Preview the cleanup
Preview cleanup shows the proposed result. For each unprotected isolated group, the stitches are reassigned to the neighbouring colour they share the most edges with; ties go to the closest-looking colour. Groups with no stitched neighbours (a lone stitch surrounded by bare fabric) are left alone, because there is no sensible colour to merge them into.
Changed squares are circled, and you can flip between Before and After. The panel states how many stitches would change and how many groups were skipped.
Step 5: Apply, or undo
Apply the cleanup and it becomes one undoable step in the history. If you change your mind three edits later, undo back to it. Nothing is deleted automatically, and the original conversion is never lost.
Going further: reduce colours
If confetti comes from too many similar shades, use Reduce colours in the same panel. It repeatedly merges the two colours that look most alike, folding the less-used one into the more-used one, until your target is reached. Before applying, it lists every merge (“Light Peach → Peach”), so you know exactly what will change.
Manual touch-ups
Automatic cleanup is a starting point. For a few remaining specks, switch to the pencil, pick the surrounding colour with the eyedropper (I), and click them away. For background speckle, the fill tool replaces a whole contiguous area at once.
How much is acceptable?
| Isolated share | What it means |
|---|---|
| Under 2% | Comfortable, even for beginners |
| 2–8% | Some thread starts for singles; fine for most stitchers |
| Over 8% | Heavy confetti; expect slow progress, consider cleanup |
These bands are guidance for the explanation the Check panel shows, not a grade. Some stitchers enjoy confetti-heavy “photo realistic” charts; the point is to choose knowingly.
Common mistakes
- Cleaning up without protecting eyes and letters first.
- Using a threshold of 4 on a small design, which can erase intentional details.
- Expecting cleanup to fix a poor source photo; start with better framing instead.
The Crescent Moon pattern is a small example where the isolated stars are deliberate: run the check on it and you’ll see them flagged, then protect them and watch the cleanup leave them alone.
Worked example: cleaning up a converted photo
A typical 100 × 100 photo conversion with 20 colours might report thousands of stitches with several hundred isolated groups. Here is a calm way through it:
- Lower the colour limit to 16 and look again; similar shades often account for a large share of the confetti.
- Highlight isolated groups. If the rings cluster in the background, remove the background colour (no stitch) first; that alone may eliminate many of them.
- Protect details. Select each eye, the nose and any lettering. Protected areas are outlined in blue.
- Preview cleanup at a group size of 2. Flip between Before and After. The subject should look the same from a distance, just less speckled.
- Apply, then check the numbers again. If a few singles remain in important places, leave them; they are probably doing useful work.
Choosing the group size
| Group size | What it targets | Risk |
|---|---|---|
| 1 | Only lone single stitches | Lowest; safe default for faces |
| 2 | Singles and pairs | Low; the recommended default |
| 3–4 | Small clusters | Can remove small intentional details; protect first |
When confetti is the point
Some stitchers enjoy highly detailed photo-realistic charts precisely because of the shading that confetti creates. If that’s you, skip cleanup, keep dithering off (it still creates more speckle than most people want), and use the tracker’s colour filter to work one colour at a time across an area. Gridding your fabric every ten stitches also helps a lot with confetti-heavy charts.
Questions stitchers ask
What counts as a confetti stitch?
A stitch of one colour that has no same-colour neighbour sharing an edge, so it usually needs its own thread start. The Studio lets you include groups of up to 2, 3 or 4 stitches in the definition.
Will cleanup ruin details like eyes?
Not if you protect them first. Select the eyes or other details and choose Protect selected area; the cleanup skips anything inside protected areas, and the preview shows every change.
Is some confetti normal?
Yes. Photo-realistic charts often have many single stitches by design. The goal is to remove noise you do not want, not every single stitch.
Can I undo a cleanup later?
Yes. The cleanup is one step in the undo history, so you can undo it even after making other edits, as long as you stay within the last 100 steps.
Try it now
Everything in this guide works in the free cross stitch pattern maker, right in your browser, with no account.
Make a pattern and open the Check panel →A pattern to practise with
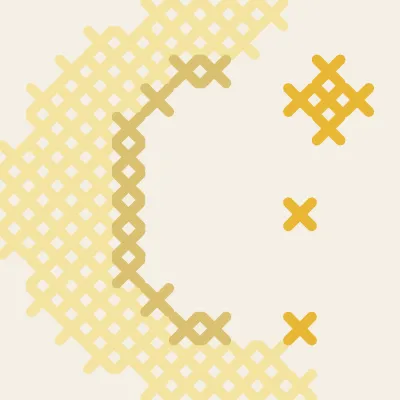
Crescent Moon
A crescent moon with four small stars, 14×14.