Guide
How to Turn a Photo into a Cross Stitch Pattern
The short answer
To turn a photo into a cross stitch pattern, crop it tightly around one clear subject, choose a width in stitches (about 80–150 for most photos), limit the palette to roughly 10–20 colours, remove the background if you want bare fabric, then clean up scattered single stitches and print the chart with a symbol key.
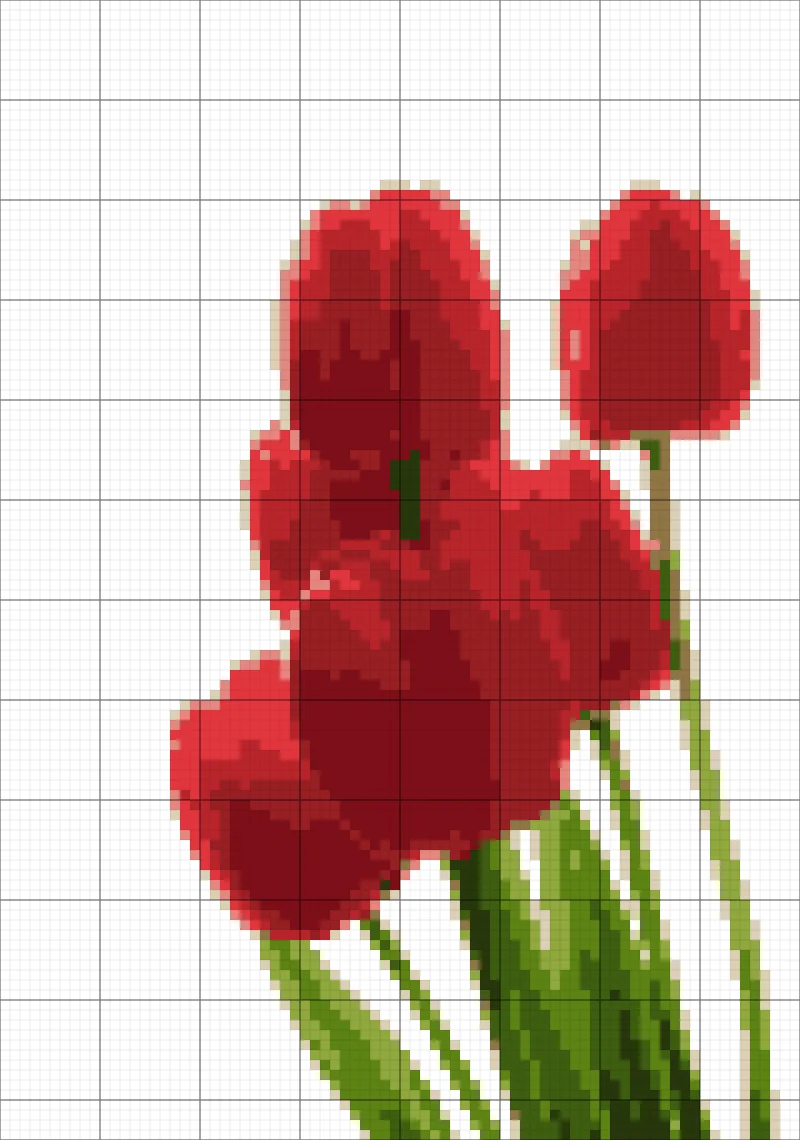
A photo is made of millions of pixels and thousands of subtly different colours. A cross stitch chart is the opposite: a coarse grid where every square is one of a few dozen threads. Converting one into the other is mostly a matter of making good decisions about what to keep. Software does the arithmetic; you decide the size, the number of colours and which details matter.
This guide walks through the whole process using the photo to cross stitch converter on this site, but the reasoning applies to any tool.
What actually happens during conversion
It helps to know the three things a converter does, because each one is a setting you control:
- Resampling. The photo is shrunk to the grid size you pick. If you ask for 100 stitches wide, every stitch represents a small block of the original photo, and the colours in that block are averaged into one.
- Colour reduction (quantization). The averaged colours are grouped into a limited palette. Our engine groups similar colours by how different they look (using a perceptual colour space called OKLab), not just by their raw numbers, so a light and dark green are less likely to collapse into one muddy tone.
- Mapping. Each stitch is assigned the closest palette colour, and each palette colour gets a unique symbol for the printed chart.
Everything you dislike about an automatic result traces back to one of these steps. Too blurry? The grid is too small. Blotchy? Too few colours, or too many similar ones. Speckled? Lots of isolated stitches, which we deal with in step 5.
Step 1: Choose and frame the photo
The single biggest factor is the photo itself. One main subject, even lighting, and a plain or simple background will always convert better than a busy snapshot. If you are not sure whether a photo will work, read how to choose a photo that will stitch clearly first.
Then crop. In the converter, open Crop & rotate, pick a shape (Square and 4:5 suit portraits and pets) and drag the frame so the subject fills it. Every stitch you spend on empty sky is a stitch you can’t spend on your subject’s eyes. Photos from phones already appear the right way up: the browser applies the orientation stored in the file once, and the tool never rotates it a second time.
Step 2: Choose the width in stitches
Width decides how much detail survives. As a rule of thumb:
| Subject | Width that usually works |
|---|---|
| Simple object, logo-like shape, flower | 50–80 stitches |
| Pet or person, upper body | 100–150 stitches |
| Landscape or group photo | 150–250 stitches |
The height is calculated from the photo’s proportions so nothing gets stretched. To see what that means in real life, divide by your fabric count: 100 stitches on 14-count Aida is about 7.1 inches (18 cm) of stitching before margins. The Aida count guide explains the arithmetic and the extra fabric you’ll need around the design.
Bigger is not automatically better. A 250-stitch chart has over 60,000 stitches and can take many months; check that the time matches your enthusiasm before committing.
Step 3: Limit the colours
Each colour is another thread to buy, another symbol to read and another set of thread changes. Start around 12–16 colours for a photo and look at the result. Then adjust:
- If faces look flat or patchy, raise the limit a little.
- If you see lots of near-identical shades scattered around, lower it.
The converter reports both the maximum you asked for and the number actually used. A photo with limited colours (a red flower on white) may use fewer than your maximum, and that’s fine.
Dithering (in Advanced mode) mixes colours in a checkerboard-like spray to imitate smooth gradients. It can look lovely on screen, but on fabric it creates thousands of isolated stitches. Leave it off unless you specifically want that texture.
Step 4: Remove the background
Many photo patterns look best with the subject floating on bare fabric. Our tool handles this manually and transparently: in the colour list, press No stitch next to the background colour, and those squares become empty fabric. You can restore it with one click. In the Studio you can erase leftover background stitches with the eraser or fill tool.
If your image has a transparent background (a PNG cut-out), transparent areas automatically become no-stitch squares, never a new “white” colour. You can choose to fill them with a background colour instead.
Step 5: Clean up isolated stitches
Automatic conversion tends to produce confetti: single stitches of one colour surrounded by another. Each one means starting and ending a thread for a single cross, which is slow and leaves bumps on the back.
Open the result in the Studio and switch to the Check panel. The Stitchability Check counts your stitches, colours and connected regions, and highlights isolated groups (one or two stitches by default). Before cleaning up, select any important details, such as the highlight in an eye, and press Protect selected area. Then Preview cleanup shows exactly which stitches would change, and Apply merges them into their neighbouring colour. It’s all undoable. The confetti guide covers this in depth.
Step 6: Review the chart like a stitcher
Switch between the Colour, Symbols and Stitched views:
- Colour shows whether the image still reads from a distance.
- Symbols is what you’ll actually follow; make sure similar colours have clearly different symbols (you can change any symbol in the Colours panel).
- Stitched is a simulation of how crosses look on fabric. It is not a photograph of real embroidery, but it is a better preview of texture than flat squares.
Rename colours to something meaningful (“Shadow brown”, “Eye highlight”); names print in the key.
Step 7: Print the chart
Choose Export / print and download the PDF. You’ll get an overview page with a map of which page covers which area, a colour and symbol key with stitch counts, and enlarged chart pages with numbered grid lines every ten stitches and arrows marking the centre. Print at Actual size / 100%. The printing guide explains overlap and paper choice.
Common mistakes
- Converting the whole photo uncropped. Crop first; it is the cheapest way to add detail.
- Too many colours. 40 colours from a phone photo usually means 20 near-duplicates.
- Trusting screen colours. Hold real floss next to the printed key in daylight. Read why screen colours and floss differ.
- Skipping the check. Five minutes of cleanup can save hours of stitching single crosses.
- Using photos you don’t have rights to. Your own photos are fine; other people’s photos, characters and logos usually aren’t for sharing or selling.
Limitations to be aware of
No converter can invent detail that isn’t in the grid. Small faces below about 60 stitches lose their features, fine textures (fur, grass) turn into noise, and automatic colour grouping occasionally merges two colours you care about. When that happens, raise the colour limit or recolour by hand in the Studio, which is exactly why the tool hands you an editable chart rather than a finished image.
Worked example: a pet portrait, start to finish
Here is the same process applied to a typical request: a photo of a dog, to hang in a 5 × 7 inch frame.
1. Plan the size from the frame. A 5 × 7 frame with a small mat shows roughly 4 × 6 inches. On 14-count Aida that is 4 × 14 = 56 stitches wide and 6 × 14 = 84 stitches tall. Because the subject is a face, 56 stitches is on the small side, so this is a good case for 16- or 18-count instead: 4 × 18 = 72 stitches wide gives noticeably more detail in the same frame.
2. Frame the photo. Choose the 4:5 crop shape (close to the frame’s proportions once the mat is considered) and drag it so the dog’s head and chest fill the frame. Leave a little space above the ears.
3. First conversion. Width 72, 14 colours. Look at the eyes and nose first: if they read clearly, the rest will follow. If the fur looks blotchy, try 16–18 colours; if it looks speckled, drop to 12.
4. Background. If the photo has a plain wall behind the dog, mark those one or two colours as no stitch. On a 72 × 90 chart this commonly removes a third or more of all stitches.
5. Clean up. In the Studio, select each eye (including its small highlight) and protect it, then preview the cleanup. Merging isolated fur stitches usually changes a few hundred squares and makes the chart far calmer to stitch.
6. Name the colours. Rename the darkest brown “Nose & eye dark”, the lightest “Muzzle highlight” and so on. The PDF key will use these names, which makes choosing floss easier.
7. Check the numbers. The Project panel shows the stitched size on 18-count (here about 4 × 5 inches) and the fabric to cut with margins. The key lists the stitch count per colour so you can see which threads you will need most.
Quick reference
| Decision | Good starting point |
|---|---|
| Width for a face or pet | 80–120 stitches (or a higher fabric count for small frames) |
| Colours for a photo | 12–16, then adjust |
| Dithering | Off |
| Isolated group size for cleanup | 2 stitches |
| Square size when printing | Standard (3.2 mm) or Large (4.2 mm) |
Questions stitchers ask
Can I turn any photo into a cross stitch pattern?
Technically yes, but results depend on the photo. One clear subject, soft light and a plain background give a recognisable chart; busy, dark or tiny subjects turn into scattered stitches. Crop tightly and choose a size that matches the detail you need.
How long does a photo pattern take to stitch?
It depends on the number of stitches, not the photo. A 100 × 100 chart with the background removed may have 6,000–9,000 stitches. Time yourself on the first 100 stitches and multiply by the total shown in the Studio or PDF to get a personal estimate.
Why does my pattern have so many colours that look the same?
Photos contain subtle gradients. When the colour limit is high, the converter keeps several nearly identical shades. Lower the limit, or use Reduce colours in the Studio Check panel, which lists every merge before applying it.
Do I need to remove the background?
No, but removing it often saves thousands of stitches and makes the subject stand out on bare fabric. Mark the background colour as no stitch in the converter or Studio; you can restore it at any time.
Try it now
Everything in this guide works in the free cross stitch pattern maker, right in your browser, with no account.
Open the photo converter →A pattern to practise with
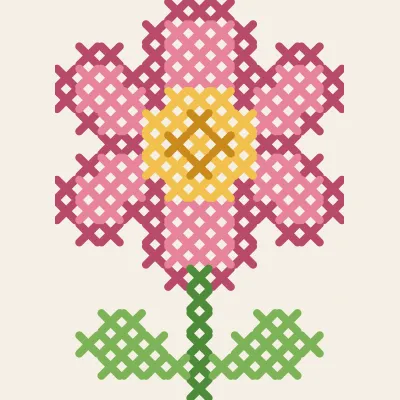
Garden Flower
A pink bloom on a stem with two leaves, 13×18 stitches.