Guide
How to Start and Finish a Cross Stitch Thread Without Knots
The short answer
Cross stitchers avoid knots because they make lumps that show through and can pull loose. Start with a loop start (for even strand counts), a waste knot or an away knot, and finish by sliding the needle under three or four stitches on the back, then trimming. For isolated stitches, run the thread under nearby stitches of the same colour where possible.
Knots are the one thing almost every cross stitch teacher says to avoid. A knot on the back makes a bump that shows through when the piece is framed or ironed, can catch on the fabric, and may work loose over time. The alternatives are quick to learn and give a flatter, neater back.
Why the back matters
You don’t need a perfect back, but you want it flat and secure. Flat, so the front lies smoothly when framed. Secure, so stitches don’t loosen when the piece is washed. All the methods below achieve both.
Method 1: The loop start
Best for even numbers of strands (2 strands on 14-count is the classic case).
- Separate one strand about twice your usual length.
- Fold it in half and thread both cut ends through the needle, leaving a loop at the other end.
- Bring the needle up from the back at your first stitch, leaving the loop hanging at the back.
- Make the first half stitch down through the fabric, and on the back pass the needle through the loop.
- Pull gently: the loop locks the thread in place. Continue stitching.
It’s fast and leaves nothing to trim at the start.
Method 2: The waste knot
Works with any number of strands.
- Knot the end of your thread.
- From the front, push the needle down a few inches away from your first stitch, in the direction you’ll be stitching, so the knot sits on top of the fabric.
- Come up at your first stitch and work towards the knot. Your stitches cover and trap the thread tail on the back.
- When the stitches reach the tail, cut off the knot on the front. The tail is now secured under your stitches.
Method 3: The away knot
Similar to the waste knot, but the knot sits on the front away from where you’ll stitch (often 3–4 in). After you finish the area, cut the knot, thread the tail on the back, and weave it under existing stitches. Useful when the tail would otherwise lie under a different colour and show through.
Finishing a thread
When you’ve used most of a length, leaving enough to re-thread:
- Turn the work over.
- Slide the needle under three or four stitches on the back, ideally of the same colour.
- Pull through gently and trim close.
For extra security on items that will be washed, run back through one or two stitches in the opposite direction before trimming.
Travelling between areas
If the next stitch of the same colour is only a few squares away, you can carry the thread across the back. Long carries (more than about five stitches, as the EGA’s beginner advice also suggests) should be woven under existing stitches, or the thread may show through, especially with dark colours behind light fabric.
Single isolated stitches
Charts converted from photos often contain confetti: single stitches of one colour. For each one you can:
- carry the thread from a nearby stitch of the same colour (if close and not under pale fabric),
- start with a waste knot nearby and finish under the stitches you just made,
- or reduce the number of isolated stitches before you start with the Stitchability Check.
Practice project
The Little Heart uses two strands on 14-count, perfect for practising the loop start. It has only three colours and almost no isolated stitches, so you’ll start and finish just a handful of threads.
Common mistakes
- Using a loop start with an odd number of strands (it only works with even counts).
- Cutting the waste knot before the tail is fully covered.
- Finishing under stitches of a contrasting colour that shows through pale fabric.
- Pulling the finishing thread so tight that the front puckers.
Which start for which situation?
| Situation | Best method | Why |
|---|---|---|
| Two strands, new area | Loop start | Fast, no tail to manage |
| Three strands (11-count) | Waste knot | Loop start needs an even number |
| Dark thread near light fabric | Away knot | Tail can be woven under same-colour stitches later |
| Continuing near existing stitches | Run under stitches on the back | No knot or tail needed |
| Single isolated stitch | Waste knot nearby, finish under the new stitch | Keeps the back flat |
Practice exercise
On a scrap of 14-count Aida:
- Start a two-strand thread with a loop start and stitch a row of 10 crosses.
- Finish by running under four stitches on the back and trim.
- Start a second colour with a waste knot placed 2 inches away in the direction of travel, stitch a 3 × 3 block towards it, and cut the knot when the tail is covered.
- Turn the fabric over: both starts should be flat and invisible from the front.
Keeping the back tidy (and why it matters a little)
A perfectly neat back isn’t required, but a tidy back:
- lies flatter, so framed pieces look smoother;
- avoids dark threads shadowing through light areas;
- makes it easier to unpick mistakes.
Aim for short, secured tails and no long loose carries; that’s enough.
Thread length and handling
- Cut about 18 in (45 cm). Longer lengths save a few restarts but wear thin and fuzzy as they pass through the fabric again and again, and they tangle more.
- Separate strands one at a time. Hold the cut end, pull a single strand straight up and out, and let the rest bunch; it untwists itself. Recombine the strands you need.
- Let the needle dangle every few stitches so the thread untwists. Twisted thread makes uneven, ropey stitches.
- Use the loop method only with an even number of strands: fold one strand in half for two strands, or two strands for four.
Troubleshooting
| Problem | Fix |
|---|---|
| Thread pulls out at the start | Cover the tail with at least three or four stitches before trimming, and keep the tail on the back |
| Lumps on the back | Weave tails under existing stitches of the same colour rather than over them |
| Dark threads show through light fabric | Don’t carry dark threads more than two or three squares across empty fabric; end and restart instead |
| Thread keeps knotting | It’s twisted; let the needle hang free, and use a shorter length |
| Fuzzy, thin stitches near the end of a length | The thread is worn; finish it off sooner |
Which start to use when
- Loop start: the neatest option for an even number of strands in one colour. Use it whenever you can.
- Waste knot: works for any number of strands, including odd numbers and blended threads. Place the knot on the front a few squares away in the direction you’ll stitch, so the tail on the back is covered as you go.
- Away waste knot: the same idea with the knot further away; useful when there are no nearby stitches to cover the tail.
- Weaving under existing stitches: the best way to finish any thread, and the way to start a new one in an area that’s already stitched.
Questions stitchers ask
Is it really wrong to use knots?
It is not forbidden, but knots create bumps that show when framed and can work loose. The loop start and waste knot give flatter, more secure results.
Can I use a loop start with three strands?
No. The loop start needs an even number of strands because you fold one strand in half. Use a waste knot or away knot for odd numbers.
How far can I carry thread on the back?
Short distances are fine. For more than about five stitches, weave the thread under existing stitches so it does not show through.
How do I finish a thread securely?
Slide the needle under three or four stitches on the back, ideally of the same colour, then trim close.
Try it now
Everything in this guide works in the free cross stitch pattern maker, right in your browser, with no account.
Practise on a beginner pattern →A pattern to practise with
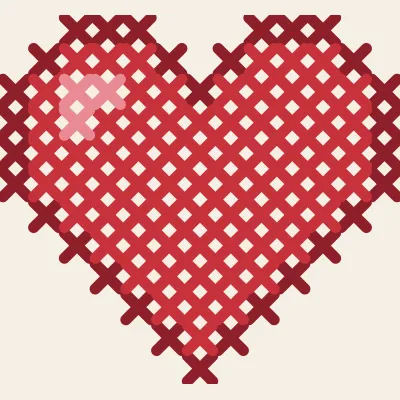
Little Heart
A 13×12 heart in three reds with a small highlight.